How to Set Up a Livestream
Learn the basics of setting up your livestream and start broadcasting your talents to the world.

- Livestreaming is a popular online activity where people can interact with users from around the world.
- With some basic equipment and a steady internet connection, it’s possible to start streaming from virtually anywhere.
- The type of software you need for your livestream depends on which platform you’ll be streaming on and which device you’ll be using (PC or mobile).
Livestreaming has evolved from a casual form of entertainment to a powerful tool used by creatives, companies, and even large-scale organizations. Although most people watch livestreams on platforms like Twitch and YouTube, other platforms like Instagram and TikTok are also hopping on the trend, adding mobile livestreaming to the mix. It may seem daunting at first, but setting up a livestream nowadays is simple with the right tools and equipment. Not sure where to start? No worries — this guide has you covered.
What Is Livestreaming?

Livestreaming is the act of broadcasting yourself online through a digital device. Many livestreamers use a web camera to display themselves on their stream, while others choose to share their screens and have that as the focal point of their content. They will also take the time to customize their stream experiences through stream assets or plugins.
When people think of livestreaming, they usually think of streamers playing video games. This is true for people who stream on Twitch, a livestreaming platform that used to focus on gaming content but has since expanded to different niches. Now, streamers host talk shows, digital co-working sessions and more.
The Basics: Livestreaming Equipment
Streaming equipment can make your broadcasting experience much easier, but you don’t need to shell out hundreds of dollars for an extravagant setup. For beginners or people looking to stay within a budget, you’ll only need a few basics.
Computer
The first and most important thing you’ll need is a streaming PC. There are a few key components you’ll want to consider. To start, look for one that has a CPU (central processing unit), which will allow you to efficiently run your applications and streaming software at the same time. If you plan on streaming in 4K or want to run more graphics-intensive games, look for a GPU (graphics processing unit) to give you a smooth, lag-free stream session. Some gaming PCs, while costly, do include some of the best CPUs and GPUs on the market. That said, you can find budget-friendly PCs that can do the job at a fraction of the cost.
Internet Connection
Since you’ll be running multiple applications (and possibly devices) simultaneously, you’ll need a stable internet connection to stay online. For the strongest and safest connection, we recommend connecting an Ethernet cable to your PC before streaming. Alternatively, you’ll want to have a strong fiber or cable internet connection — that way, you’re less likely to disconnect during your stream. Internet providers like AT&T, Spectrum and Xfinity offer fiber and cable internet plans that provide fast download and upload speeds suitable for streaming.
Microphone
Part of the livestreaming experience involves interacting with your audience, so you’ll want to invest in a microphone. You can choose to use either a microphone that’s part of a headset or an external mic. If you’re just diving into the world of livestreaming, there’s no need to invest in a gaming mic immediately — a standard microphone that can record audio will work just as fine. But if you want a microphone that doesn’t pick up any background noise and doesn’t require you to wear a headset, you can look into dynamic microphones.
Smartphone
If you plan on streaming on a mobile-friendly platform, like TikTok or Instagram, consider investing in a smartphone. Most people who stream long-form content on places like X and Twitch will diversify their content by using their smartphones to stream themselves and find even more ways to directly engage with their audiences. You’ll need to download the app before going live and you also want to configure your stream settings within the app.
Camera (Optional)
Streaming setups often include a camera (also known as a “facecam”), which can be used if you’d like to broadcast yourself alongside your content. While it isn’t necessary to start livestreaming, especially if your stream focuses on other types of media, it does provide an extra element that your viewers can engage with: you. When setting up your stream, be sure to place the camera in a stable location so it stays put for the duration of your broadcast.
Headset (Optional)
If you don’t use a dynamic microphone or adjust your audio settings, the sound of your stream will be output through your external speakers, which could get picked up by your microphone and disrupt your streaming experience. You can choose between headsets (with a microphone) or headphones (without a microphone). Note that headsets have ear cushions that can be worn over-the-ear, in-the-ear, or on-the-ear. Most streamers will use over-the-ear cushions for the most comfort, but we recommend experimenting with different sets to see which one is the most comfortable for you.
Second Monitor (Optional)
Technically, you can get away with streaming your content while running your livestreaming software on the same screen. However, it may look too cluttered or cause you to go through a tedious process of switching between both applications. This is where a second monitor can be really useful. With the extra screen space, you’ll be able to see both your livestream and your content together without having to alternate between the two, and it’ll make it much easier to manage your stream while you’re live.
Your Digital Home: Livestreaming Platforms
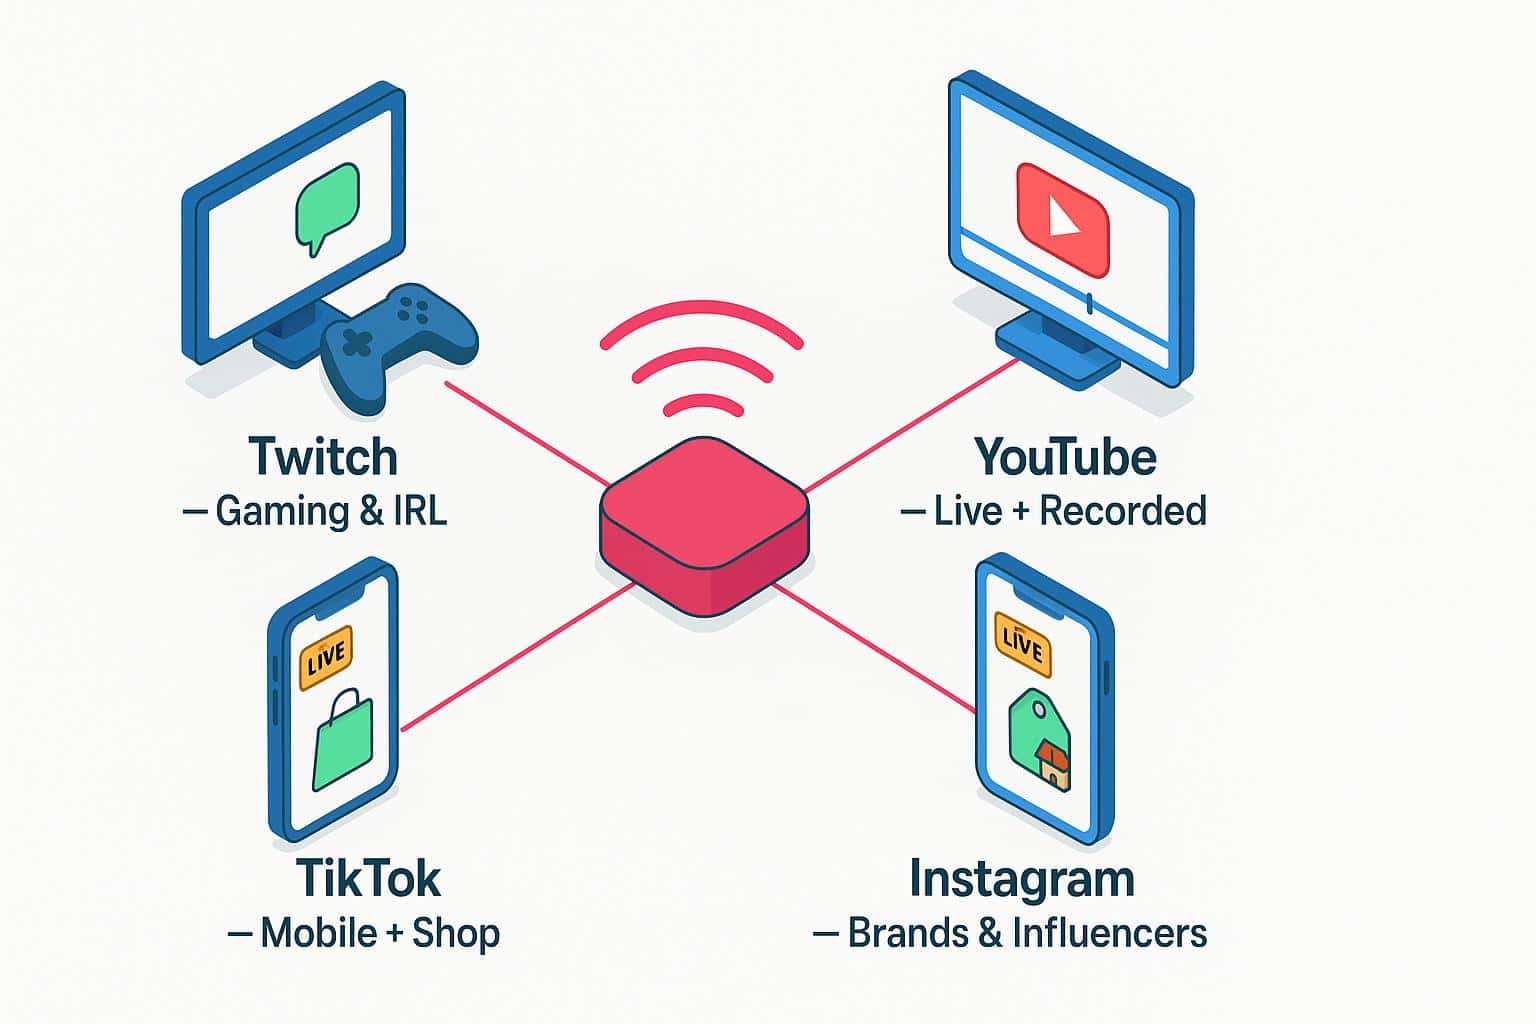
Deciding which platform to use as your primary broadcasting location depends on what type of content you’d like to stream. Do you love playing video games? Are you a hobbyist? Will you be doing a talkshow or podcast? With so many platforms to choose from, you just have to narrow down the type of content you’ll create, your audience and whether or not you enjoy using the platform.
Twitch
Twitch is designed for gamers in mind, serving as the home for live gaming content. However, it has evolved to include topics unrelated to video games, such as IRL (In Real Life), music, art and more. This platform is ideal for those who love playing games or interacting with an audience who has gaming or gaming-adjacent interests.
YouTube
Similarly to Twitch, YouTube has a community of livestreaming gamers on its platform. However, its position as the biggest video platform allows other creators to livestream just about anything and still get some decent reach. Live vlogs, co-working sessions and even news can be streamed live on YouTube and watched alongside its usual recorded content. If you plan on creating recorded and live content, YouTube is your best bet.
TikTok
TikTok lends itself perfectly as the place for streaming live via mobile. Unlike Twitch and YouTube, TikTok’s mobile-friendly features and interface allow users to stream from anywhere by just using their smartphone. While they can enhance their broadcast by using external mics and other equipment, just a smartphone alone is enough to stream live on this platform. Plus, its heavily shop-centric feature is what makes livestreaming so popular on the app as it helps small business owners generate income from users around the world.
With the introduction of Reels, Instagram soon became another central hub for short-form video content alongside TikTok. Many established businesses, organizations, and brands use Instagram’s Live feature to connect directly with their audience — not just their fans but also their customers. Instagram is also an ideal livestream space for influencers who want to promote their brands or products to their audience.
Livestreaming Software

Once you’ve got the equipment and platform for streaming, it’s time to decide which application you’ll use to manage your stream. This software allows you to customize every part of your broadcast, from stream alerts to stream assets. Below are some of the most popular livestreaming software programs.
Open Broadcaster Software (OBS)
OBS, or Open Broadcaster Software, is an open-source software for video recording and livestreaming. Funded by well-acclaimed sponsors and backers, it’s ideal for streamers who want the most customization options for their streams. The learning curve is a bit steep, but there are plenty of tutorials online (along with the OBS Support page) to help broadcasters of all experiences.
Streamlabs
With its foundational code derived from OBS, Streamlabs (formerly TwitchAlerts) is a user-friendly livestreaming software that provides an all-in-one suite of stream assets. This software is excellent for those just starting to stream and want to get off the ground running as soon as possible. Its library of tools and plugins makes it easy to customize your stream display to be unique to your experience.
XSplit
Multistream displays, custom stream transitions and chat overlays are just a few of the many powerful features offered through XSplit. Although its software is limited to Windows users (and paid users for premium features), many people find XSplit a top-notch streaming software that can cater to their streaming needs. For beginners who want to broadcast to multiple platforms and still run their stream in one place, XSplit is likely the best option.
Best Practices Before Starting Your Livestream

Livestreaming comes with its own learning curve — you’ll always have triumphs and challenges as you figure out your streaming style. Still, it’s best to consider a few housekeeping rules before you press that “Stream” button.
Test Your Equipment
One of the worst things that can happen during your stream is a technical difficulty or malfunction mid-broadcast. Before you start streaming, test out your equipment. This can include checking your microphone settings to make sure that your stream picks up sound. The same rule applies to sound output. You’ll also want to check any other equipment you may be using, like your camera or stream deck.
For a more thorough check, do a simple test stream and invite your friends and family to watch. Have them provide feedback in your chat and apply it as you continue streaming. This will also allow you to test your internet connection speeds to make sure there are no latency issues. It will take some extra work, but you’ll be more prepared for your next (and first!) stream.
Plan Your Stream Content
Take some time before you stream to plan out what you’d like to do once you go live. If you plan on streaming gaming content, write a list of games you plan on playing and pick out which ones you’ll want to play on which days. The same principle can apply if you’re streaming other content like a podcast or an art session. Writing down your content ideas and mapping out a consistent stream schedule will give you much less work as you continue livestreaming.
Consider Using Stream Assets
If you want viewers to click on your livestream, you’ll want to make it stand out. The most common way to do this is to decorate it with stream assets, which include transition screens (an intro and an outro), overlays and alerts. Some sites (including software like Streamlabs) offer a limited number of free stream assets. Remember that if you continue pursuing livestreaming, consider investing in paid assets or commissioning designers to create custom assets.
Tell Your Friends and Family
Who better to broadcast your livestream to than your friends and family? Letting them know the date and time of your livestream will not only help you set up an audience but also allow you to get more comfortable with being in “livestream” mode. Plus, there’s a chance that someone new will see your stream and audience and want to jump in, which will help you continue building your audience.
Best Practices During Your Livestream
Congratulations! You’ve hit that “Start Stream” button and you’re now broadcasting your content to the world. But the work doesn’t stop there. There are a few things you’ll want to keep in mind while you’re online.
Make Sure You’re Streaming, Not Recording
All, if not most, streaming software comes with livestreaming and recording features. This is great if you decide you want to record your content and upload it to your social media platforms rather than livestream. However, make sure that when you’re ready for streaming that you click the right button. You don’t want to leave your audience hanging!
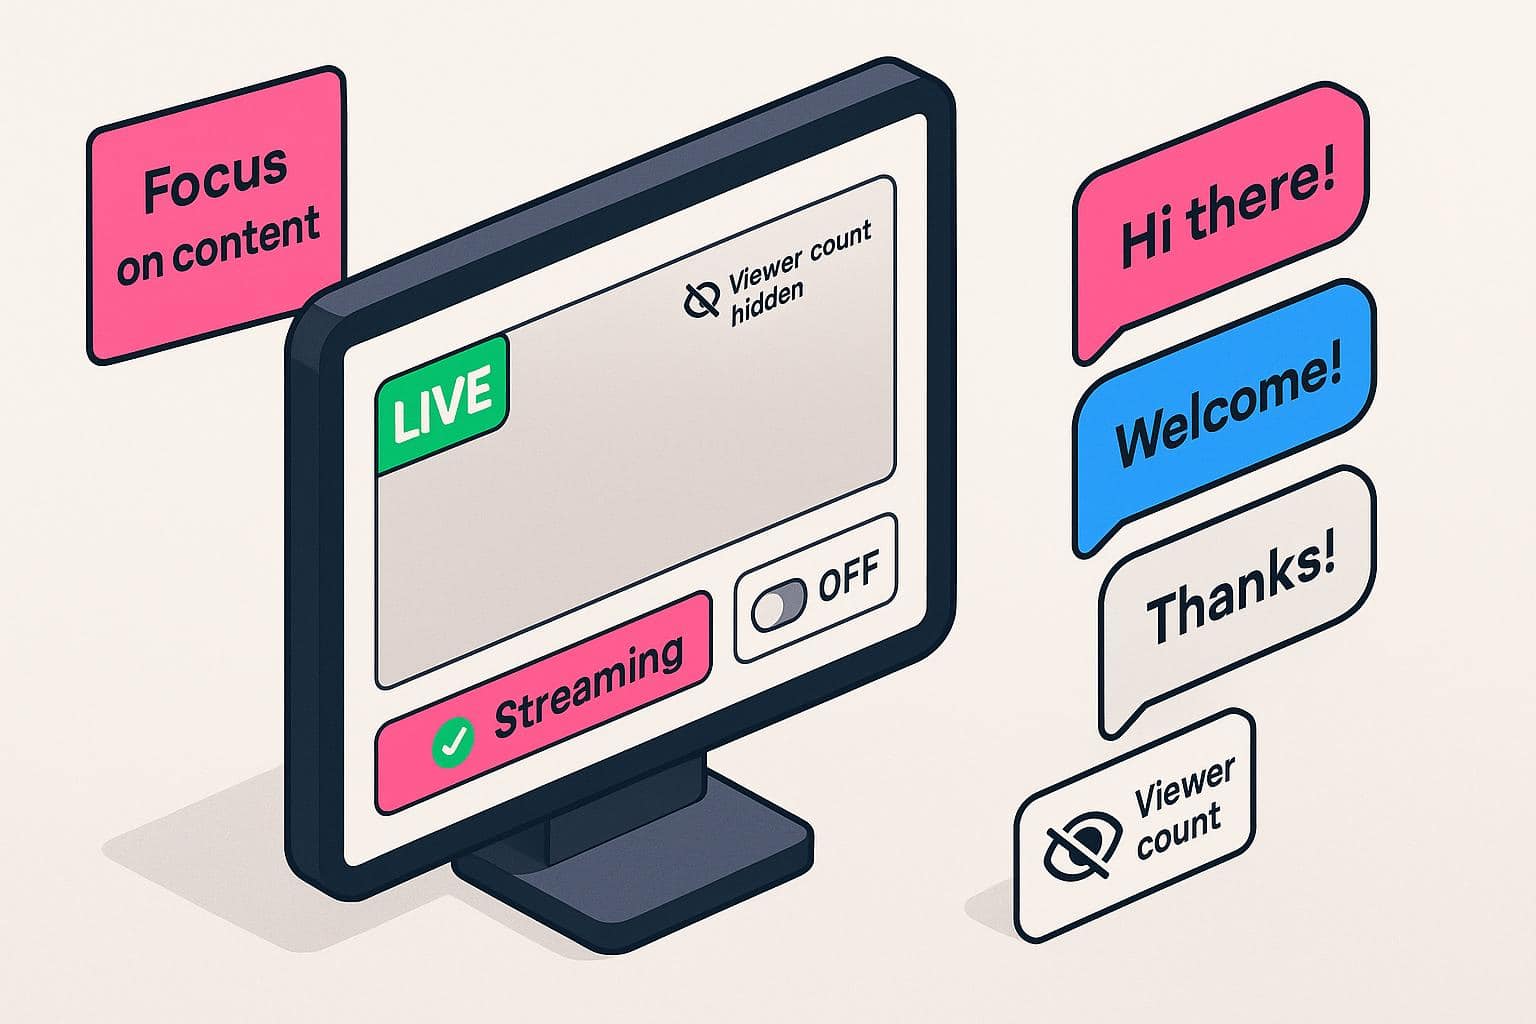
Focus on Content, Not Numbers
Your first few streams can seem daunting, and one habit you’ll immediately be tempted to pick up is to look at the number of viewers on your stream (which is a feature included in all streaming software). While it can provide a confidence boost to see the number go up, it could also be discouraging when you see the number fluctuate. When streaming, it’s best to focus on creating your content. You’ll have more fun along the way, and you’ll organically attract people who are interested in watching you. It’ll also allow you to troubleshoot in case you end up dealing with stream lag or other technical difficulties.
If you really want to stop peeking at your viewer count, you can disable it in your stream settings.
Interact With Your Audience
When you’ve got your audience, don’t be afraid to say hello! They’re here for a show, and shows require engagement. Ask them how they’re doing, what they’re up to — make them feel like they’re part of your (growing!) community. When you end your stream or if they let you know that they’re leaving, thank them for stopping by and encourage them to follow you on your streaming platform and your social media pages so they’ll know when you’ll go live next.
Best Practices After Your Livestream

Check Your Post-Stream Stats
Once you’ve ended your stream, your respective streaming platform will gather your streaming stats and present them on a dashboard. These include peak viewers, stream time and the number of subscribers gained. It can take a while for your stream stats to show up, but once they do, you’ll want to look at them to see how your stream performed. You can also use it as a tool to track your stream growth.
Ask for Feedback
The best way to improve your streams is to ask your audience. From newcomers to your most dedicated viewers, getting feedback will help you learn your strengths and shortcomings and allow you to fill in the gaps to further improve your stream performance. Even as you gain more experience streaming, you should continue to get feedback and strive to improve continuously.
Plan Your Future Content
Like stream performance, you’ll want to continuously improve how you plan your content. If you’re just starting, you don’t need to focus on just one type of stream content. Experiment with different genres or styles to see which ones fit you the best. Plan all of them and follow your plan consistently, adjusting it as you see fit. As you learn which streams work best for you, you can further define your content plans and goals.
Frequently Asked Questions About Setting Up a Livestream
How much money do I need to spend on livestreaming equipment?
You don’t need to spend thousands of dollars on streaming equipment. A headset with a microphone, a webcam and a decent-performing PC is more than enough to start. As you stream more, you can invest in adding more tools or upgrading your current setup.
What can I stream besides video games?
Artists can stream their drawing progress online, while DJs can show off their music skills and take song requests. Podcasters and talk show hosts can also livestream their sessions to their fans, while other creatives can host co-working sessions to give people some background noise while they work.
Which internet provider is best for livestreaming?
We recommend internet providers that offer fiber or cable connections. ISPs like AT&T and Xfinity offer plans that deliver fast and stable download and upload speeds that are ideal for streaming. Check to see if these ISPs are available in your area.
How do I test my livestream before going live?
You can set your stream as unlisted or private so no one can watch you unannounced. Verify audio levels and bitrate, run a speed test, check for dropped frames, and review the replay for sync issues.
How do I set up a stream on YouTube?
First, go to YouTube Studio, verify your channel if prompted, then enable Live, choose Stream, Webcam, or Mobile, set your title and privacy, select your encoder or camera, check audio and/or video settings and, finally, click “Go Live.”